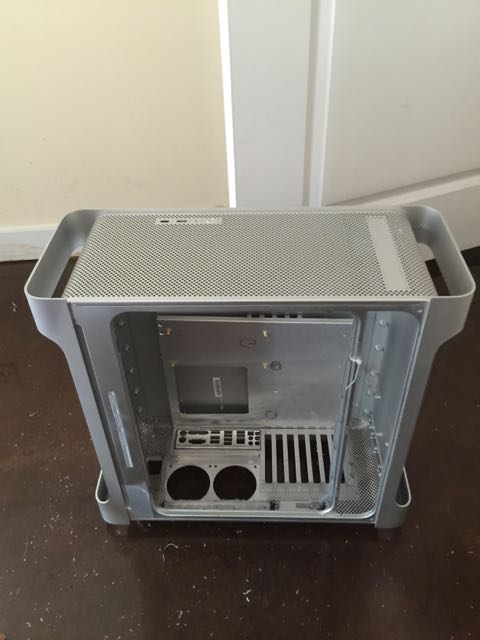
I’m not a fan-tastic by any means, however I desired to preserve the design of the G5 airflow with a few enhancements and innovations. Simply put, I reversed the flow of the fans out the front of the case because a hackintosh back plate isn’t usually perforated, however the front of the case remains so. Additionally, I placed feet on the back of the mac to take advantage of the fact that heat naturally rises, which combined with the front exhaust should lead to optimal cooling, or at least equal cooling with a nice new cool look!

G5 Vertical Exhaust Feet

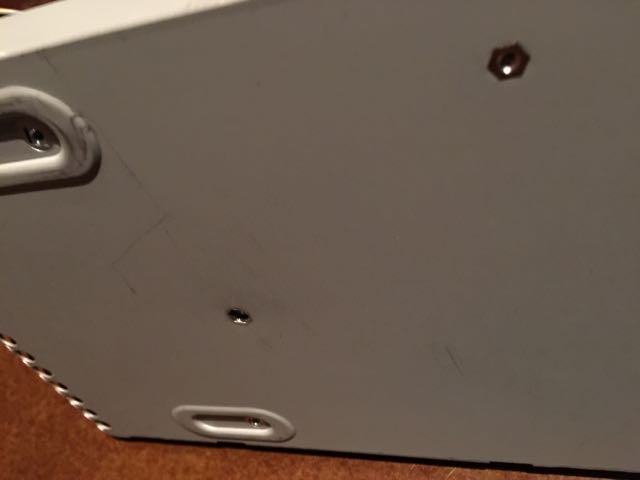
I added aluminum door stops to the rear of the case to allow vertical placement. In order to ensure the black rubber in the door stop exceeded the aluminum (to protect your floor), I place a washer inside of the door stop under the black rubber insert, when the preexisting screw fastened it into place. I also placed washers underneath the screws to increase the height a bit and level it with the single stopper mounted to the ‘mountain mods’ backplate, as to ensure they they are level. Depending on your configuration, monitor cables can be quite tall, so you will need to either elevate it by placing something esthetic beneath the feet, or HDMI cables which are not that tall. For these reasons and the lack of extentions, my case is still horizontal at the moment, but that will change 🙂

IMG_0838

Vertical G5

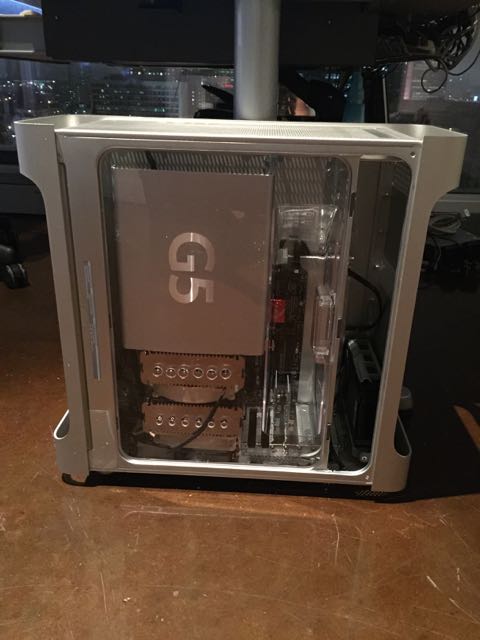
G5 Plate to be relocated in front of CPU Fan, just a preview of its beauty 🙂
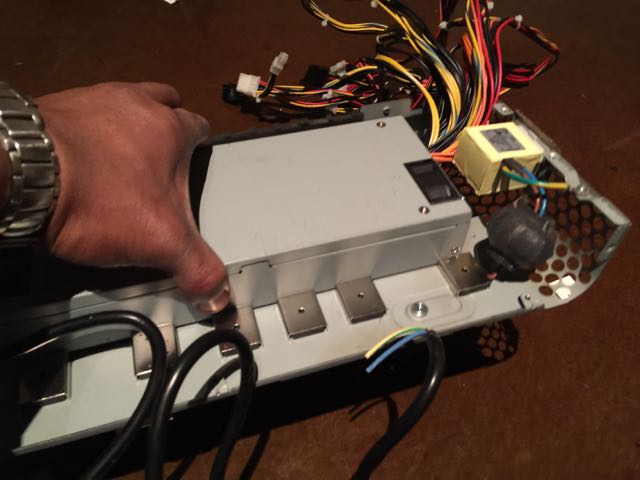
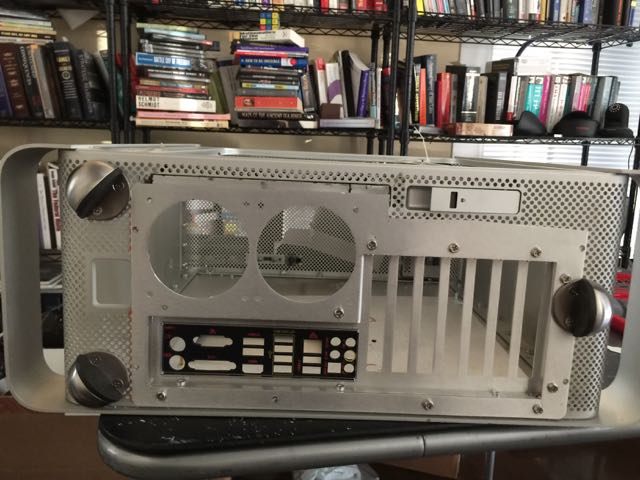
G5 Reverse Air Flow

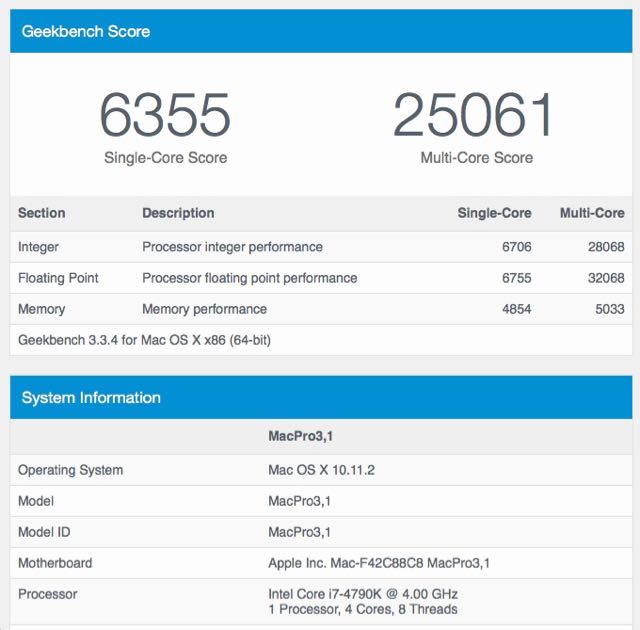
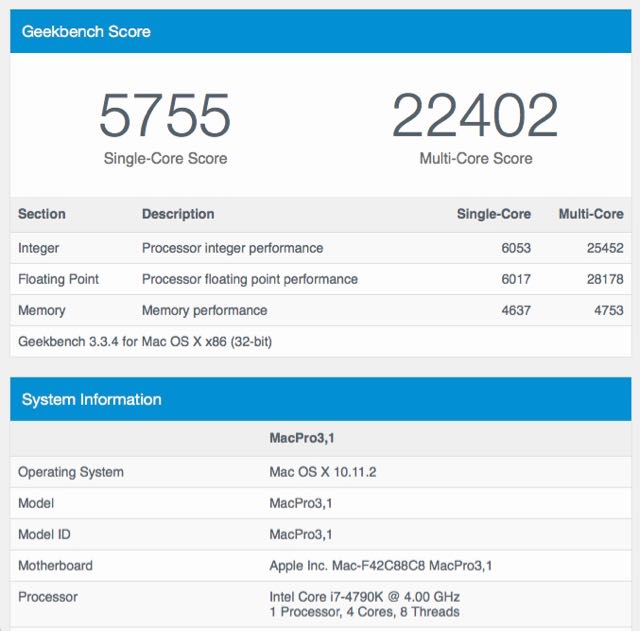
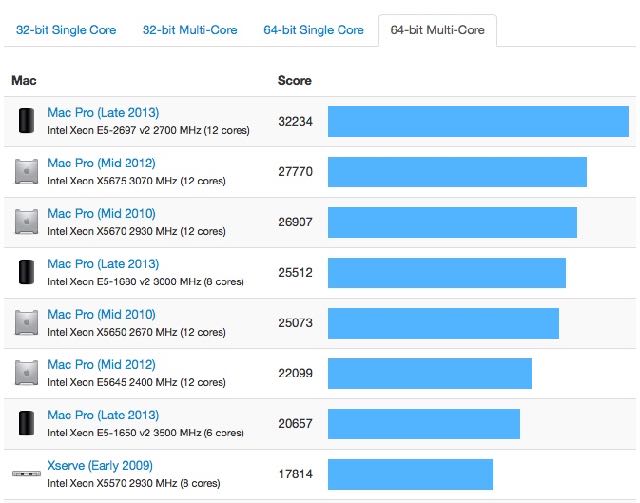
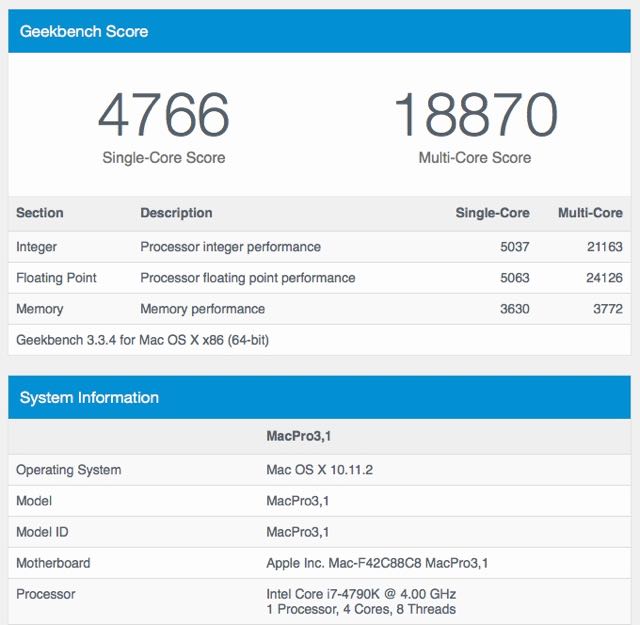
As you from the image above, the backplate has less perforation to release heat. For these reasons, I reversed all 10 Noctua fans to all blow out the front. Currently, at 4.7Ghz after a 7hr stress test, the highest temperature I could raise running Geek-bench natively with OCCT running in a VM along side Pov Ray benchmark was 77C degrees (3 hrs), with an average visual in the high 60’s and low 70’s. Of all the fans, the two CPU fans are not running at full speed continuously (but manual 2.5/PVM) while the others are, as Noctua fans are so silent and helps idle hold temperatures of approx 29C.

IMG_0886

Notice the Gigabyte GTX 770 Windforce fans were replaced with Noctua fans! Why, because the Windforce plate was to big too close with the wind deflector (clear shield)


hw_monitor_77c_stress_test

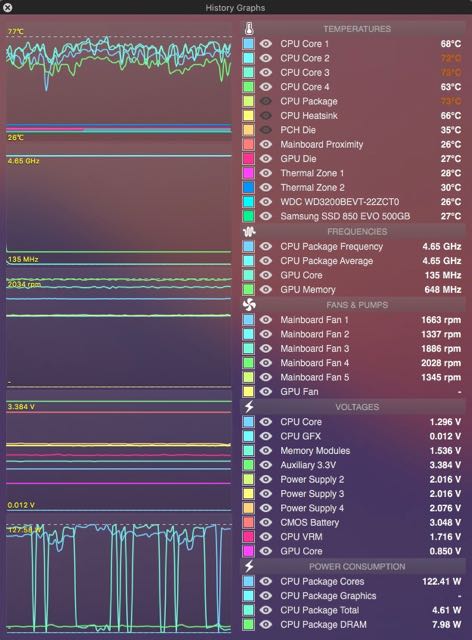
Max 77c while running for at least 30mins at this point. 7hrs to go 🙂


Conclusion

As you can see from above, the system remains pretty cool and innovative. More to wright on this subject, so stay tuned!

If you want to take advantage of all the goodies of the G5 case, you will want to re-use the current PSU enclosure. This allows utilizing ALL the fan harnesses and prior cooling system as designed by Apple. I’ve often seen mods which ditch such reuse, because either their motherboard was an ATX vs mATX which is shorter, and needed the additional space, or because a traditional ATX power supply just simply won’t fit, which is the most common obstacle I presume. Solutions have been either to, 1)  buy a standard PSU and take it apart, or 2) cut into floor plate which usually covers power supply  inside of the Mac, or 3) Just let the PSU sit on the floor without using the traditional G5 PSU enclosure altogether. Each option has it’s disadvantage which is either difficult, voids the warranty, or discards use of the G5 fans. However, the following approach is not only the easiest, it preserves the PSU warranty, and provides the stock functionality of the G5 case.

Mounting your Power Supply

The solution the the problem involves buying a 1U power supply, and installing it, without cutting, using rare earth magnets which attach the the frame of the inner case and the PSU itself.


IMG_0803

How Strong is the Magnet?

As you can see from the images below, using even a single layer of magnets allows you to lift the hull without issues, and easily remove and reinstall your power supply with ease. However, after some testing, the pyramid stacking above is the strongest, as it increases the surface area on the PSU itself. Be sure to pyramid stack on the sides, and you only need singles in the front and back to prevent it from moving in those directions.

IMG_0799

Hull modification

There is only one change need to be made to the outer shell, which is to drill out a spacer. This allows you to sit the 1U power supply in the desired location. Otherwise, no changes to the PSU itself, which allows easy service if necessary.

IMG_0802

Noise Reduction

I also took the liberty of  ordering replacement 40mm fans, as 1U fans are somewhat loud, perhaps because they are traditionally used in servers where noise is less of an issue. I used Noctua 40mm fans, though you can use whatever price/performance ratio fan that fits your needs. Do be sure that wires are secured before assembling everything, otherwise you will hear the vibration as you dread disassembling the entire machine to fix it 🙂

Parts

1 – Master Magnetics CA403CNX20 Magnet Fastener, Rectangular with Center Hole Nickel Plated, 1″ Length, 0.875″ Width, 0.250″ Height, 7 Pounds, Silver (Pack of 20)

1 – FSP Group 600W 1U size for Rack mount Case Power Supply 80PLUS BRONZE (FSP600-801UK)

  • Note: Any ATX 600w+ PSU should work if it fits within housing. This also be found at FSP website.

2 – Noctua NF-A8 ULN Premium 80mm Fan

Conclusion

While 1U power supplies may cost additional bucks, plus the cost of an additional fan should yours be loud as mine was. It doesn’t require cutting your new equipment and voiding the warranty, and allows you to benefit from the design of the modded case, and saves considerable time on the installation. So ask yourself, whats your time and warranty worth? You know my vote.

IMG_0840

I will begin by saying this was an arduous project compared to former builds, primarily due to the case modification. Additionally, It’s been many years since I’ve built a machine as I transitioned to Mac as soon as they went unix, and until recently Mac’s could not be built, which caused me to purchase my last pre-assembled desktop machine which was a late 2005 G5 tower (the most beautiful desktop ever made). However, despite this I’ve recently revitalized her as a hackintosh which  per my testing on one occasion, surpasses the performance of the current Mac Pro 2013, both 4 and 6 core in every benchmark, including 32 and 64 bit and single and multicore test using geekbench, all within a budget of approximately $1600. However, the reproducible results you will find lags only slightly in multi-core test when compared to the > 6-Core Mac Pro. In these series of post, I will endeavor to show my results and what I have done differently, as there are any adequate guides on such a general build, but think if you are not the kind of person that has much fabrication experience, I demonstrate a simple approach I used which you can do with just a drill, and re-use most the G5 parts as intended (though depending the back plate/case mod used, you may need a hack saw as I did).

Performance Test

My current configuration is running i7-4970k at 4.7 Ghz @ 1.3v. It should be noted that my initial test at this speed were significantly lower than below (what you typically see for 4.7), even when I managed to clock her at somewhat stable 4.8Ghz  (passing 7hr stress test). I thought the deciding factor, what remained different, was how I configured my cooling system. However, after coming back to my system a day later it returned to what is expected of such overlock. Nevertheless, I will try to recover the phantom build, but until I have definitive steps to reproduce it you may see it’s wonders below:

64 Bit Phantom Geekbench Test

geekbench_64bit_47ghz_1_3v_fan_plus

32 Bit Phantom Geekbench Test

geekbench_32bit_47ghz_1_3v_fan_plus


Mac Pro 6 core 64 Bit Geekbench Test

I don’t bother showing the single core test, as the standard i7-4970k overcomes it in either Hackintosh or iMac, where the Mac pro 6 core would still usually win is in multi-core test, however as you can see from above, it fails there to. It should be noted, the normal Hackintosh overlocked at 4.7GHz get’s a core of approximately 18870 in my case. However, with proper configuration of divine inspiration from the universe, it’s apparent it can do more.

geekbench_mac_pro_2013_64bit_multicore


64 Bit Regular Geekbench Test

Here is what you can expect that is very produceable for a 4.7Ghz stable overclock. No, not as fancy as the phantom results, but absolutely reproducible and still faster than every Mac Pro in single core results, while lagging behind ever so slightly in multi-core results when compared to the 6 Core Mac Pro (20657 vs 18870).

Normal 4.7GHz Results

 Performance Conclusion

I suspect that because most configurations regarding overclocking were set to auto, which means the motherboard filled in the values depending on what you have entered, when provided with the right conditions did adjust its configuration to allow for phantom results. While I thought it initially a fluke, I verified it by running unit test that normally takes approximately minute finish in about 45 seconds. Wherefore, the results were likewise experienced real word while maintaining good temperatures. However, because I didn’t explicitly set the values myself, they may never be reached again; or perhaps, it could have been universe smiling, or both. Either case, traditional benchmarks still outpace the Mac Pro 4 core that is twice the price, and keeps pace with its bigger brother with ease. Until I go phantom, stay tuned!


IMG_0839